Google Checkout payment method
 |
Description
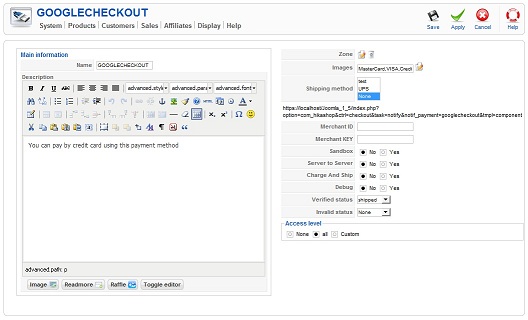
This screen enables you to edit the
Google Checkout payment method options. Payment methods will be filtered
on checkout based on the zone you set for them, if any. Then, they will
be displayed to the user for him to choose which payment method he
prefers for his order.
Note that Google Checkout can only
support one currency. If the order is made in another currency, the
Google Checkout payment method won't be available.
Toolbar
- Save : Save the Google Checkout payment method options and return to the payment methods Management screen.
- Apply : Apply the modifications to the Google Checkout payment method and stay on the same screen.
- Cancel : Return to the previous screen without saving the modifications.
- Help : This button enables you to turn ON/OFF the help section, this screen will appear or disappear.
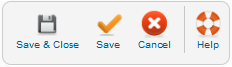
Main Information
If you use one of our commercial
versions, you will be able to enter the name and description in
different languages. This feature requires to have joomfish installed
and can be activated in the configuration page, in the display tab. The
languages available will be the ones in joomfish. If you don't enter
something for a translation, it will just use the default information in
the Main information tab instead. After you click on
save or apply an additional publish icon will appear next to the fields
where you entered something in the languages tabs so that you can easily
enable or disable them. The default publish status can also be changed
in the configuration page of HikaShop.
Additional Information
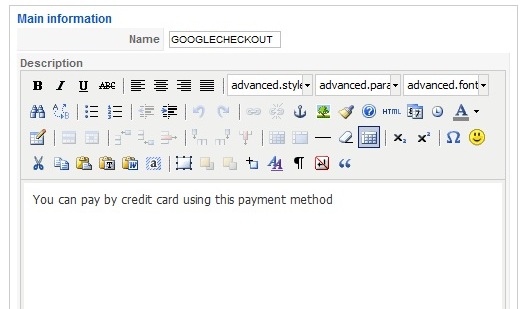
- Zone : You can restrict the Google Checkout payment method to a zone. By clicking on the edit icon, a popup will open enabling you to select a zone. You can also remove this limitation by clicking on the delete icon.
- Images : You can click on the edit icon to select one or several images to display next to the name of the Google Checkout payment method during the checkout process. Those images are stored in the folder media/com_hikashop/images/payment so you can easily add more of them by uploading your images to this folder via FTP.
- Shipping method : With this option you can select the shipping method for which this payment method will be available. For example, if you choose UPS, this payment method will only be usable if UPS is selected as shipping method. If an other shipping method is selected, this payment method will not be displayed. Note: if you selected "None" or don't select any shipping method, this payment method will always be available.
- Url : Here is the API callback URL you have to paste into your Google Checkout configuration. This url is used by Google to send a notification to Hikashop and confirm an order.
- Merchant ID : Put here your merchant ID. You should get this ID in the Google Checkout configuration by clicking on Settings > Integration. Your Merchant Key and Merchant ID will appear under 'Account information.'
- Merchant Key : Put here your merchant Key. This key is generated by Google in your Google Checkout configuration. It is used to authenticate and verify the integrity of any messages you exchange with Google Checkout.
- Sandbox : The Sandbox is used for testing. Once you have tested the plugin, you can pass to a production phase and select "No".
- Server to server : If you activate this option, the Google Checkout plugin will use the Google Web Service to transmit the cart information.
- Charge and ship: If you activate this option, the order will be automatically validate and set as "shipped" in your Google Checkout account.
- Debug: You can activate the debug mode of the Google Checkout payment plugin. If you do so, informations about each notification received from Google Checkout will be logged in the payment log file. You can see and modify the location of this file in the configuration page of HikaShop.
- Verified status : Here, you can select the status to set to an order if the plugin receives a successful completion notification from Google Checkout for an order.
- Invalid status : Here, you can select the status to set to an order if the plugin receives a notification from Google Checkout for an order with an amount different from the order total or in a different currency. In that case, we highly recommend you to check your Google Checkout account, the order information, and maybe contact your customer, and decide yourself what to do with the order.

great bhai
ReplyDelete